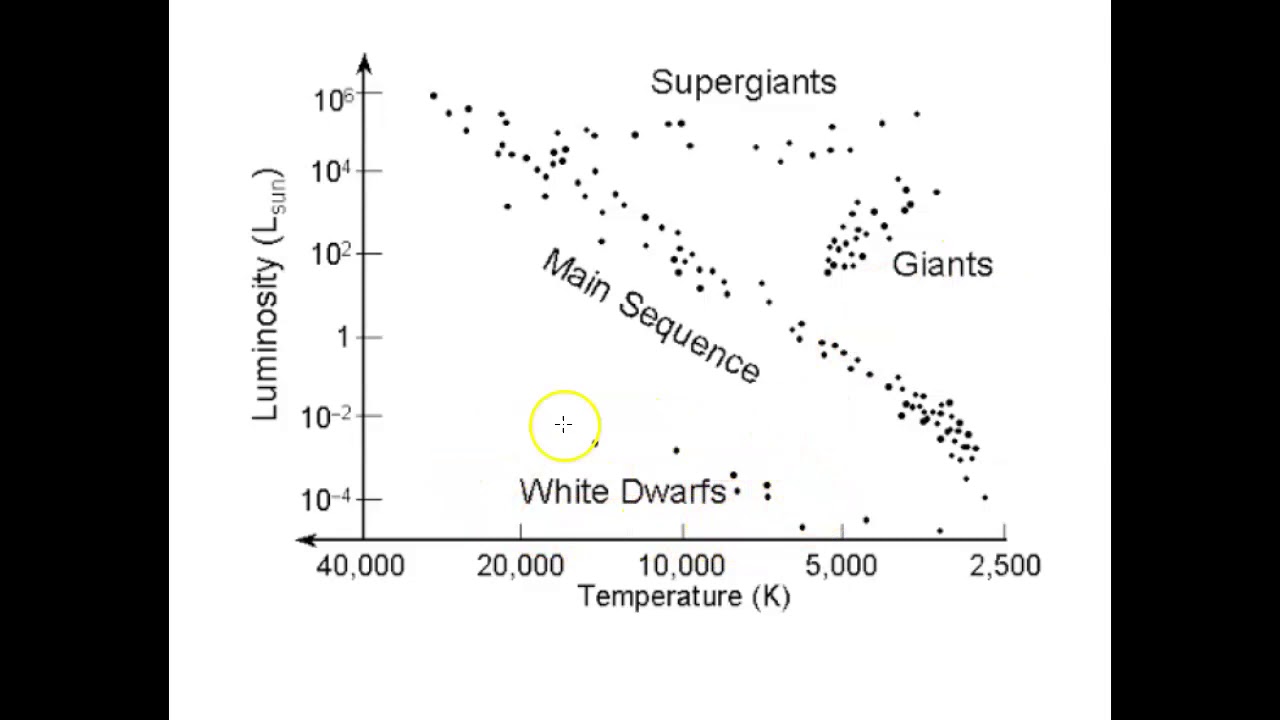
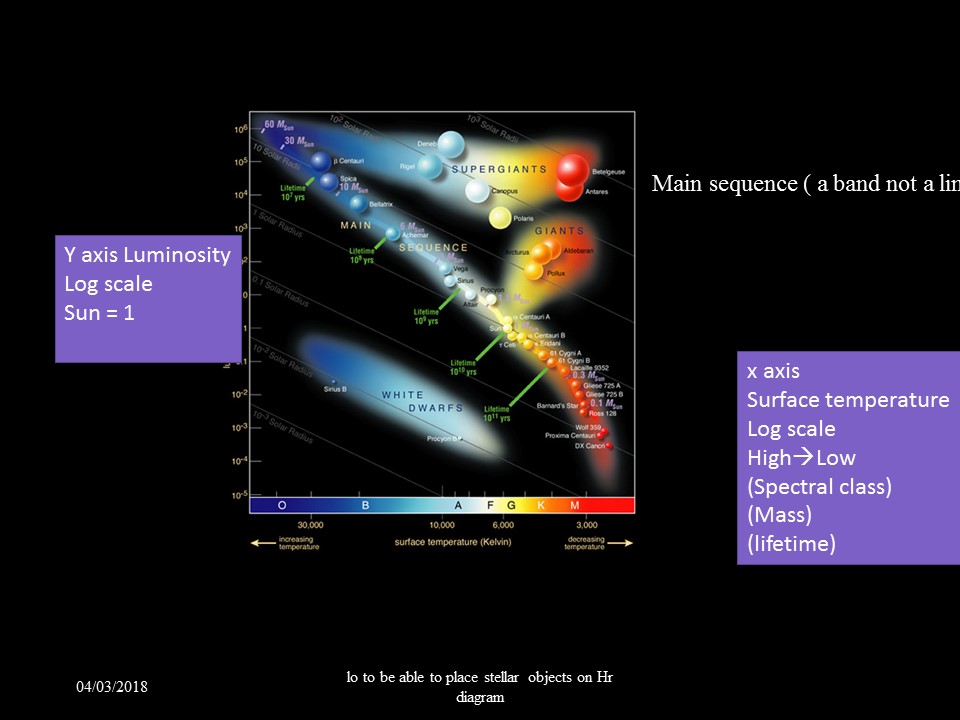
H.r. diagram H-r diagram The figure below shows a typical h-r diagram with a describe the structure of the h-r diagram
Lab #11: Understanding the H-R Diagram (continued) | Chegg.com
Part 1: the h-r diagram Diagram stars luminosity sample astronomy axis plotted star temperature spectral sequence where class main sun graph selected most stellar labeled Diagram curated reviewed
Chandra :: educational materials :: pulsating variable stars and the
Solved:referring to the h-r diagrams in exercise 22.13, which diagramH r er diagram File:h-r diagram.svgSolved the h-r diagram is a helpful tool for organizing and.
Lab #11: understanding the h-r diagram (continued)H. r. diagram – (contd.) Solved 20. the above diagram is an h-r diagram withH-r diagram practice.

Solved the h-r diagram is an incredibly useful tool and a
Introduction activityLab #11: understanding the h-r diagram (continued) Solution: h r diagramH-r diagram wkst.
Solved 1. explain the h-r diagram. how is it organized, andDiagram hr hertzsprung stars variable russell white chandra star russel age dwarf sun red giant pulsating magnitude absolute plotting spectral Solved on the h-r diagram shown, drag to each position theDiagram answer hr russell hertzsprung grade star 8th cycle life interactive questions universe characteristics left spectral class middle school index.

H-r diagram diagram
H-r diagramsThe h–r diagram Diagram most stars where ppt powerpoint presentation plot spend also doI am not including the h-r diagram that can easily.
Lab #11: understanding the h-r diagram (continued)2. using the h-r diagram just completed answer parts Diagram stellar roadmap understanding presentation generic ppt powerpoint exampleH-r diagram interactive for 9th.

Diagram life star cycle hr stars blue hotter sequence hottest main called chart types properties science would their than hertzsprung
Solved lab #11: understanding the h-r diagram (continued)Astronomy – pearson a11y Mr lloyd's interactive board: h-r diagramDiagram powerpoint presentation ppt.
Solution: h r diagramLab #11: understanding the h-r diagram (continued) .